A speaker mounting bracket is the unsung hero of any professional audio installation. It’s the single piece of hardware responsible for keeping your expensive speakers safely in the air and aimed perfectly at your audience. Getting this choice right is the first, and arguably most critical, step to getting great sound in your venue, and we're here to show you how.
Choosing the Right Speaker Mounting Bracket for Your Venue
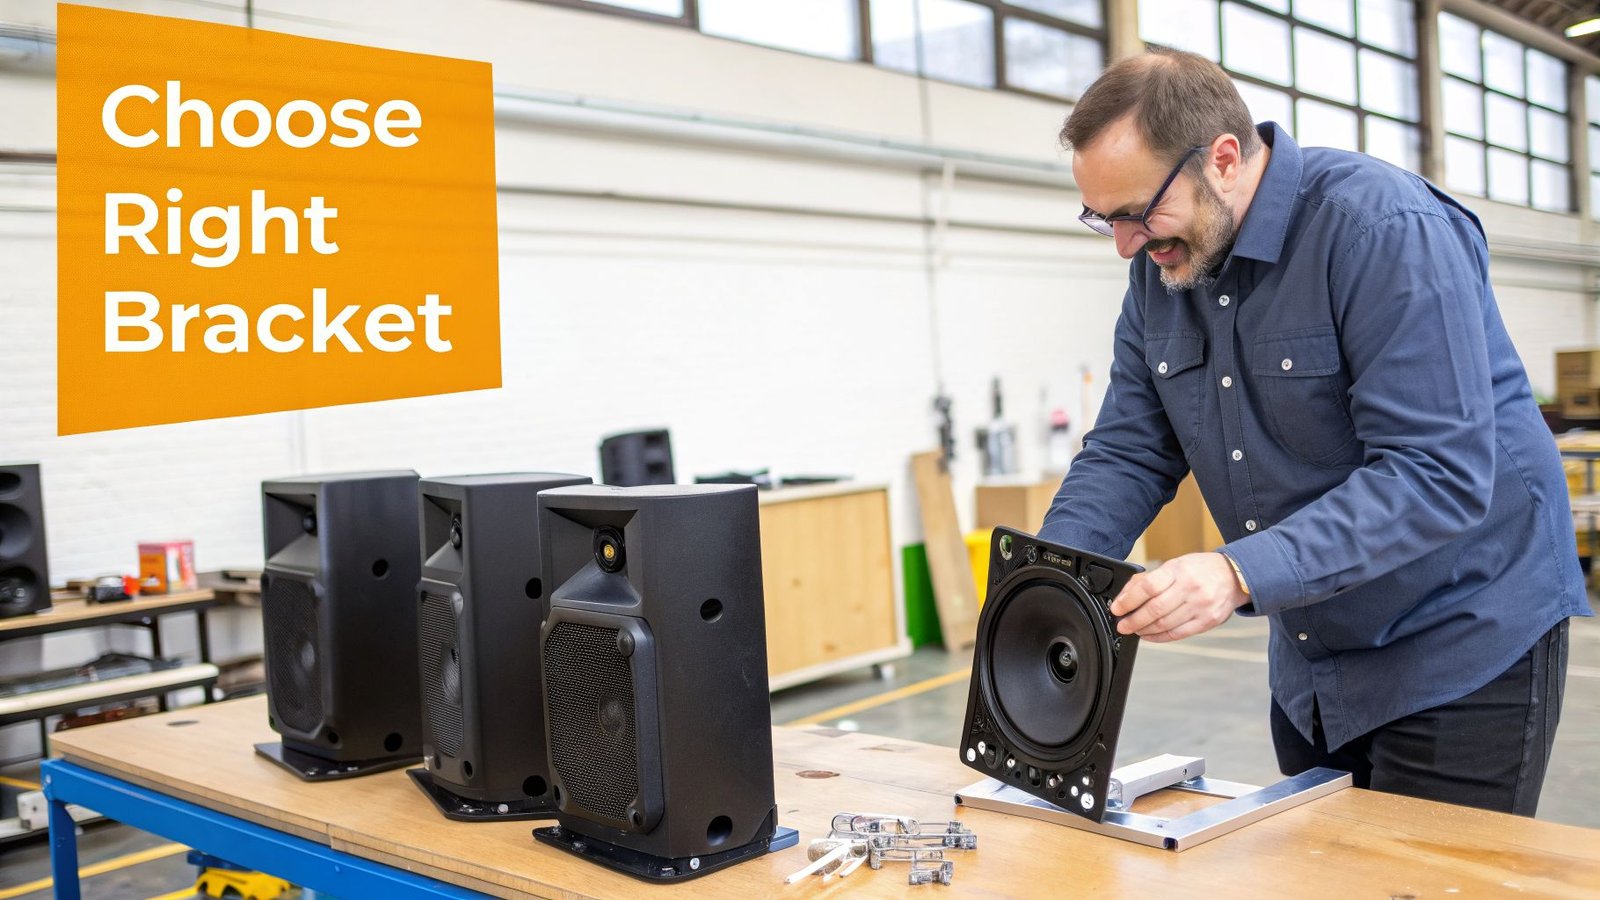
Selecting the right speaker mounting bracket is about much more than just finding something that fits. This choice is the foundation for your entire sound system's performance and, more importantly, its safety. A mismatch between the bracket, speaker, and the wall or ceiling can lead to terrible audio coverage, damaged gear, or a catastrophic failure. This is where theory has to meet practical, real-world application.
Your decision should boil down to three key factors: your speaker's weight, its dimensions, and its specific mounting pattern (often called "fly points" or threaded inserts). Let's break down the common types of brackets we use and where they really shine.
Pro Audio Speaker Bracket Type Comparison
To make sense of the options, it helps to see them side-by-side. This table breaks down the most common bracket types we install in churches and venues, helping you match the hardware to the mission.
| Bracket Type | Ideal Scenario | Example Speaker Models | Key Advantages | Things to Consider |
|---|---|---|---|---|
| Fixed Wall Mount | Permanent installations where the speaker's natural dispersion covers the area well. | RCF C MAX Series, Yorkville C Series | Extremely strong and rigid; lowest profile against the wall. | No aiming flexibility; requires perfect initial placement. |
| Tilting Wall Mount | Mounting speakers high on a wall in sanctuaries, auditoriums, and gymnasiums. | RCF ART 9 Series, dBTechnologies OPERA Series | Allows downward angle to aim sound at the audience, not walls. | Can't be swiveled side-to-side. |
| Full-Motion Mount | Multi-purpose rooms, stages with changing layouts, or complex room shapes. | dBTechnologies B-Hype Series, DAS Audio Altea Series | Maximum flexibility (tilt and swivel) for precise aiming. | Can be bulkier; requires careful cable management to avoid pinching. |
| Ceiling Mount | Venues with very high ceilings, architectural obstacles, or no suitable wall space. | Yorkville EF Series, RCF HD Series | Positions speakers directly over the listening area. | Installation is more complex and often requires a lift and rigging. |
| Pole / Yoke Mount | Truss mounting for stages, or attaching a speaker to a subwoofer pole. | Most portable PA speakers with a pole socket. | Quick setup for portable systems; allows for pan and tilt. | Not a permanent "flown" solution; relies on a stable base. |
Ultimately, the goal is to choose a bracket that not only supports your speaker's weight but also gives you the aiming capability you need for clear, direct sound.
Key Takeaway: For most churches and schools, a tilting mount is a much better investment than a fixed one. The ability to control the vertical angle is essential for getting sound to the people and away from reflective surfaces like back walls and ceilings.
Real-World Scenarios in Action
Let's apply this to a couple of common jobs. Imagine a church sanctuary with high, vaulted ceilings where we need to install a pair of RCF ART 9 Series speakers. A heavy-duty tilting wall mount is the perfect call here. It lets us mount the speakers safely above the congregation and angle them down to fire sound directly into the pews, which dramatically improves clarity and minimizes echo.
Now think about a school gymnasium that needs a versatile speaker like the dBTechnologies B-Hype series. That space is used for basketball games, assemblies, and theater productions. For this, a full-motion speaker mounting bracket is the clear winner. You can aim the speaker toward the bleachers during a game and then swivel it toward a temporary stage during a school play, giving you optimal audio for every single event.
The demand for these professional mounting solutions is exploding. The wider speaker mount market is projected to nearly double, reaching an estimated $26.54 billion by 2032. This growth is heavily influenced by live sound solutions for churches and performance venues, where brackets are essential for installing the line array systems that now make up over 57% of the pro speaker market. You can explore the full analysis of the speaker mount market to see how these trends are shaping professional audio.
Investing in the correct speaker mounting bracket from the very beginning prevents costly and dangerous mistakes down the road. At John Soto Music, we help you find the perfect match for your specific speakers and venue, ensuring your system sounds fantastic and stays securely in place for years to come.
Getting It Right: Load Calculation and Surface Prep for Safe Speaker Mounting
Mounting professional audio equipment is serious business. When you're hanging heavy speakers over people's heads in a church or venue, there's zero room for error. Safety is everything.
Before you even think about drilling a hole, two steps are absolutely critical: figuring out the total load and making sure the wall can handle it. Getting this right is what separates a professional, permanent installation from a disaster waiting to happen.
You can't guess on this. First, you need to calculate the total dynamic load. This isn't just the speaker's weight you see on the spec sheet. It's the combined weight of the speaker, the mounting bracket, all the cables, and then multiplying that by a safety factor to account for real-world forces.
The Simple Formula for Safe Load Calculation
To make sure your installation is rock-solid, we always use this straightforward formula:
Total Load = (Speaker Weight + Bracket Weight) x Safety Factor
That Safety Factor is a crucial multiplier. It accounts for things you might not think about, like vibrations from the music, accidental bumps, or even minor building shifts. For hanging gear overhead, a safety factor of 4 is the absolute minimum standard, but we always recommend using a factor of 5 for peace of mind.
Let's run through a real-world example. Say you're mounting a DAS Audio Altea-712A speaker, which weighs in at 43 lbs. The heavy-duty tilting bracket you’ve picked out adds another 11 lbs.
- Combined Weight: 43 lbs (speaker) + 11 lbs (bracket) = 54 lbs
- Total Load Calculation: 54 lbs x 5 (Safety Factor) = 270 lbs
That number—270 pounds—is what your mounting point and hardware must be rated to support without question. It’s the foundation of a safe install.
Matching Hardware to Your Mounting Surface
Once you know your total load, it's time to look at the wall itself. The material your wall is made of will dictate exactly what kind of hardware you need to use. Using the wrong anchor is one of the most common—and most dangerous—mistakes I see.
Wood Studs: This is usually your best-case scenario. You’ll want to use heavy-duty lag bolts and drill them straight into the center of the stud. A good stud finder is non-negotiable here.
Concrete or Cinder Block: For these solid surfaces, you'll need a hammer drill. Use specialized concrete sleeve anchors or wedge anchors, which expand inside the hole to create an incredibly strong mechanical grip that won't let go.
Brick: This is similar to concrete, but with one major catch: you must drill into the solid brick, not the mortar between them. Mortar is far weaker and can easily crumble under a heavy, vibrating load.
Drywall with Metal Studs: Mounting on metal studs is tricky but doable. It requires toggle bolts or snaptoggles. These anchors have wings that open up behind the stud and drywall, spreading the load out over a much wider surface area.
A Pro's Warning: Never, under any circumstances, should you trust plastic drywall anchors to hold a professional PA speaker. They are designed for things like picture frames and will fail completely under the weight and vibration of a speaker. You must anchor directly to a structural element.
The demand for doing this right is huge. The global speaker wall mount market hit $1.36 billion in 2023 and is projected to climb to $2.1 billion by 2033. That growth shows just how essential a professional-grade speakers mounting bracket and the correct hardware have become. You can read more about these speaker wall mount market trends to see how the industry is moving.
By carefully calculating your load and choosing the right anchors for your wall, you're building a foundation of safety that will protect your gear, your venue, and your people for years. At John Soto Music, we can help you verify your hardware choices for any speaker and bracket combination to make sure you get it right.
Step-by-Step Installation of Your Speaker Mounting Bracket
Alright, you've done the hard work of planning, calculating loads, and picking the right bracket. Now comes the part that can feel a bit nerve-wracking: actually drilling into your walls and getting that speaker mounted securely.
This isn't just about brute force. Installing a professional speaker mount is a game of precision. I'm going to walk you through it, step-by-step, just as if I were on-site with you.
Let's use a common scenario. Imagine we're hanging a 30 lb dBTechnologies OPERA 12 speaker on a concrete block wall in a high school gymnasium. The goal is solid, reliable audio for assemblies and games. You can't afford any mistakes here.
Assembling Your Installation Toolkit
Showing up with the wrong tools is the fastest way to turn a simple job into a frustrating mess. For a concrete wall installation like our gym scenario, having the right gear is non-negotiable.
Here’s what you absolutely need in your toolkit for a concrete job:
- Hammer Drill: Don't even think about using a standard drill. It won't make a dent. A hammer drill is essential for masonry.
- Masonry Drill Bit: Make sure the bit diameter perfectly matches the concrete anchors you’re using.
- Socket Set with Ratchet: This gives you the control and torque needed to tighten lag shields and bolts without overdoing it.
- Tape Measure & Pencil: For marking your spots. Measure twice, drill once.
- Level: A 24-inch or 48-inch level is your best friend. A crooked bracket looks unprofessional and can affect speaker aiming.
- Stud Finder: While we don't need it for this concrete wall, it’s a must-have for any drywall or wood stud installation.
- Safety Glasses and Gloves: Drilling concrete creates dust and debris. Always protect yourself.
Once you have these laid out, you're ready to start.
From Marking Holes to Securing the Speaker
First, find your ideal mounting height. For most venues, this is between 8 to 12 feet off the finished floor. Use your tape measure to mark this height, then use your level to draw a perfectly straight line where the top of the bracket's wall plate will sit.
Hold the wall plate against your line and mark your drill holes with a pencil.
Here's a tip I've learned from years of doing this: drill a small pilot hole first with a smaller masonry bit. This creates a guide and stops the larger bit from "walking" off your mark, which is crucial for perfect alignment.
Now, grab the correct size bit and drill the holes to the depth specified by the anchor manufacturer. Keep the drill straight and use a vacuum or compressed air to clear all the dust out of the holes. This step is critical—clean holes allow the anchors to expand properly and grip the wall. Gently tap the concrete lag shields in until they are flush with the wall surface.
Next, it's time to mount the wall plate. Place it over the prepared holes, insert the lag bolts, and tighten them down with your socket wrench. Get them snug and secure, but do not overtighten. Cranking down too hard can crack the concrete block, compromising the entire installation. Give it one last check with your level before moving on.
With the wall plate solid, attach the speaker adapter to the back of your dBTechnologies speaker. This typically involves two or four bolts that screw directly into the speaker's built-in threaded inserts.
Finally, grab a helper. Carefully lift the speaker and lock it onto the wall bracket, following the exact latching or locking mechanism for your specific bracket model.
This process highlights the core safety steps for any installation.
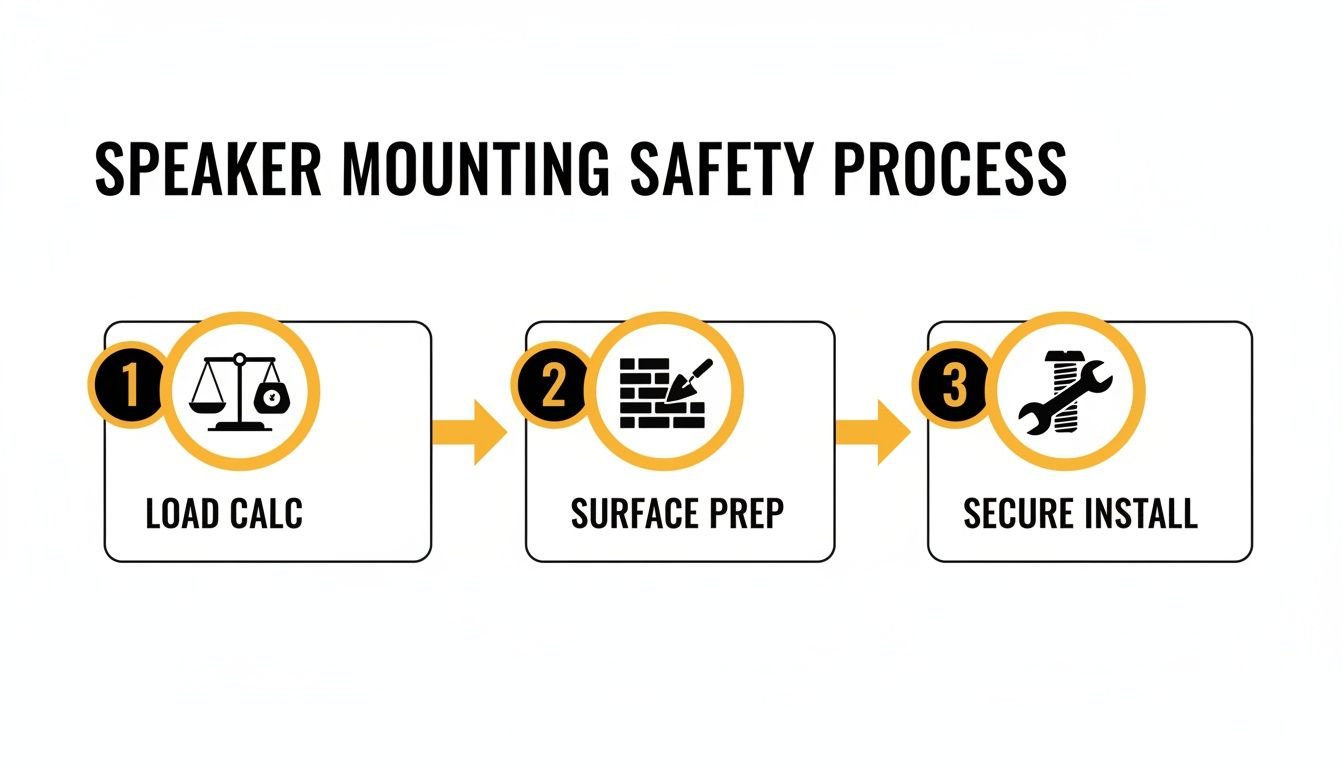
As the diagram shows, a secure installation is the result of careful planning and correct procedure. It's the final piece of the puzzle.
By following this process with patience and attention to detail, you can get a professional-grade result. At John Soto Music, we don't just sell you the gear; we provide the expert guidance to make sure your project is a success from the first measurement to the final soundcheck.
Wiring and Aiming Your Speakers for Perfect Sound
Getting that speaker securely bolted to the wall is a huge step, but the job isn't quite done. Now comes the part that separates a good-enough install from a truly professional one: wiring and aiming.
These are the final touches that transform a physically mounted speaker into a high-performance audio tool. Let's make sure every single person in your venue gets the clear, direct sound they deserve.
Taming the Cables for a Clean, Safe Setup
Messy cables—what we sometimes call "cable spaghetti"—are more than just ugly. They're a tripping hazard, they look incredibly unprofessional, and they're begging to get damaged. For any permanent installation, running your speaker and power cables cleanly is absolutely non-negotiable.
You really have two great options for managing your cables:
- Surface-Mounted Raceways: These are plastic or metal channels that you can stick or screw right onto the wall. You just tuck the cables inside, snap the cover on, and you're left with a single, clean line that can even be painted to match the wall. Raceways are a fantastic, cost-effective choice for concrete or brick walls where running cables inside the wall just isn't happening.
- In-Wall Wiring: If you're working with drywall or doing new construction, running the cables inside the wall gives you the absolute cleanest finish. It’s more work, of course. You'll need to drill through studs and install wall plates with the right connectors (like Speakon or XLR) near the speaker. The result, though, is a seamless, pro look with zero exposed wires.
No matter which way you go, always leave a little extra cable at the speaker end. We call this a service loop. That small coil of extra wire means you can easily service or reposition the speaker later without having to pull a whole new cable run.
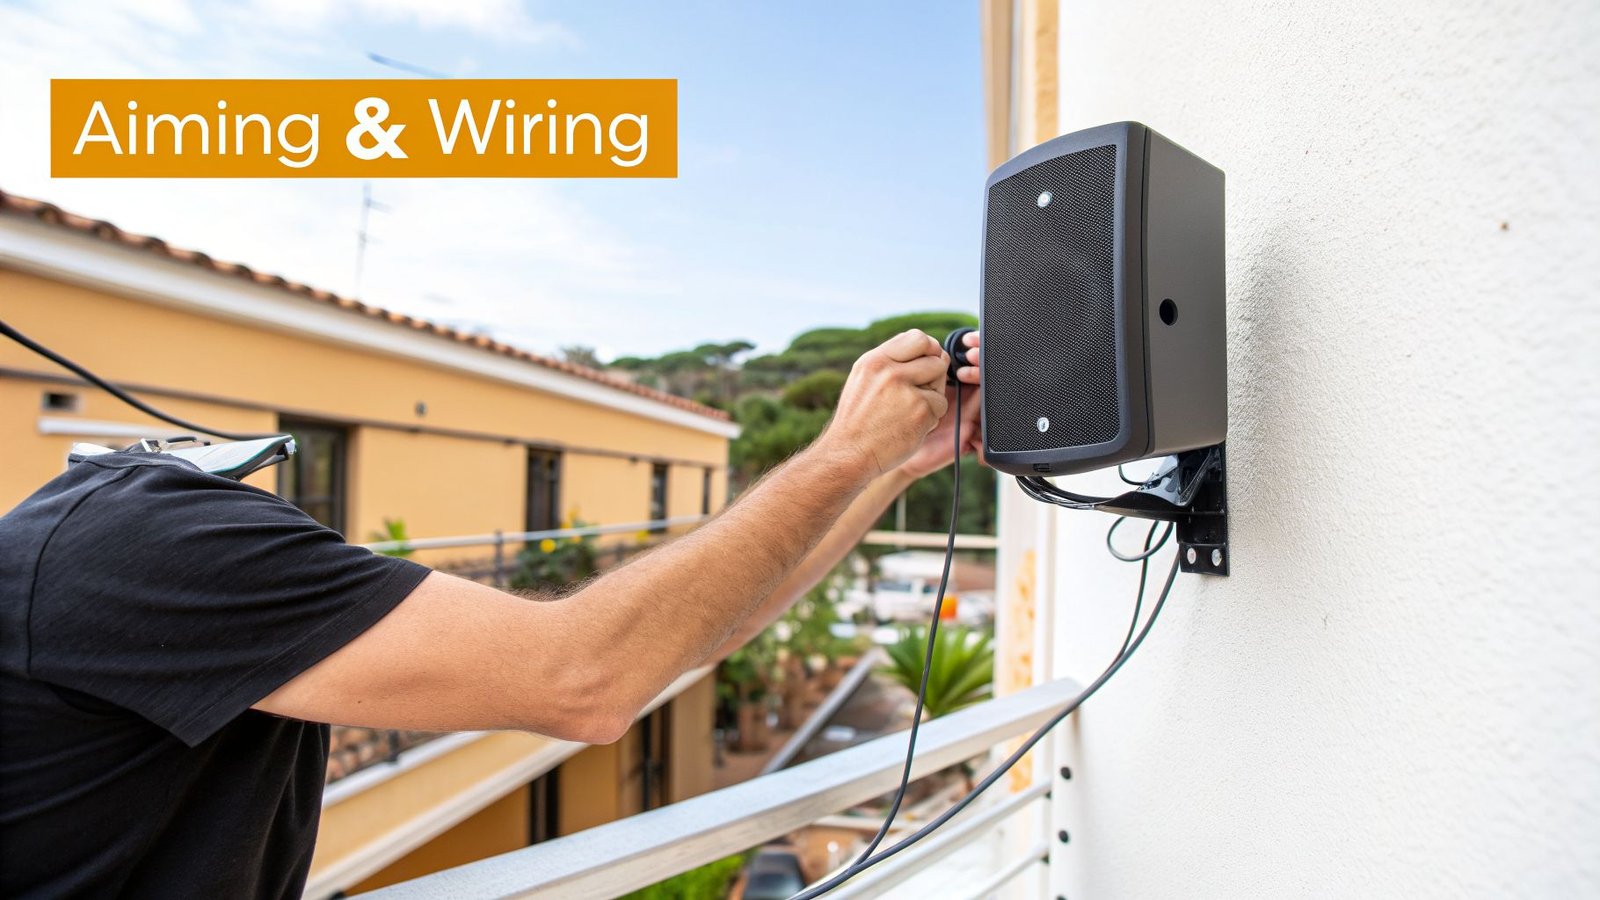
The Art of Aiming for Maximum Coverage
With the wiring handled, it’s time to aim your speakers. This is where the adjustability of your speakers mounting bracket really shines. The goal is simple: point the sound where the ears are, and keep it off reflective surfaces like walls, ceilings, and empty floors.
Key Insight: Proper aiming can cut down on feedback by as much as 30% in some rooms. When you direct the sound energy at the audience instead of letting it splash all over hard surfaces, you dramatically reduce the amount of sound that can bleed back into your microphones.
Think of your speaker's coverage pattern like the beam from a flashlight. You want to light up the audience, not the whole room. Use your bracket’s tilt and swivel adjustments to dial in the coverage perfectly. For a typical room, a slight downward tilt is often all it takes to cover everyone from the front row to the back.
A Real-World Example: A Church with a Balcony
Let's picture a classic challenge: a church sanctuary with a main floor and an upper balcony. If you just point a speaker straight ahead, you'll either blast the balcony and overshoot the main floor, or you'll hit the main floor and completely miss the people upstairs. This is exactly where a tilting speakers mounting bracket becomes invaluable.
- Main Floor Coverage: First, you’d mount the main speaker high on the front wall. Then, you use the bracket to create a downward tilt, aiming the speaker's horn so the sound just skims over the heads of the front row and carries all the way to the last row on the main floor.
- Balcony Coverage: For the balcony, you'd install a second, smaller pair of "fill" speakers. These would be mounted under the balcony ceiling or on its front face, also on tilting brackets. You'd aim them down to cover just that balcony seating area.
This approach creates a clear and cohesive sound experience for every attendee, no matter where they're sitting.
This kind of professional installation is driving a strong market for high-quality audio hardware. In fact, the speaker bracket market alone is projected to hit $6.7 billion by 2026. That growth is tied directly to the increasing demand for professional PA and in-wall speaker systems that rely on secure, flexible mounting. You can explore detailed speaker bracket market insights to learn more about the sector. At John Soto Music, we carry a wide selection of these pro-grade brackets to make sure your investment sounds its absolute best.
Common Installation Mistakes and How to Avoid Them
Learning from experience is a great teacher, but learning from someone else's mistakes is a lot less expensive and stressful. Even with the best speakers and the perfect bracket, a few common installation errors can completely sabotage the safety and performance of your new sound system.
I've seen it all out in the field—from hardware that was doomed to fail from the start to speaker placements that created a sonic nightmare. This is my list of the most frequent pitfalls I've had to fix. Getting it right the first time will save you from costly damage and, more importantly, keep everyone safe.
Using the Wrong Hardware for the Wall
This is, without a doubt, the most common and dangerous mistake I see. It's so tempting to just use the screws that came in the box or grab whatever anchors you have lying around. This is a recipe for catastrophic failure. The hardware absolutely must match the wall surface and your load calculations.
What Not to Do: I once got a call from a school where they tried to hang a 35-pound speaker on a drywall wall using only the included wood screws. They completely missed the stud. The speaker’s weight and vibrations pulled the screws clean out of the drywall within a week, leaving two gaping holes and a smashed speaker on the floor.
What to Do Instead: For that same drywall scenario, you have to use a stud finder to locate the center of a wood or metal stud. Then, use heavy-duty lag bolts that penetrate at least 1.5 to 2.5 inches into the stud itself. If you're mounting to concrete or brick, you must use proper masonry anchors and a hammer drill—there are no shortcuts here.
Forgetting the Bracket's Weight
When calculating the total load, it’s easy to focus only on the speaker's weight. So many people completely forget that a heavy-duty steel speakers mounting bracket adds a significant amount of weight on its own—often 10 to 15 pounds or even more.
Critical Safety Reminder: Always add the bracket's weight to the speaker's weight before you apply your safety factor. Forgetting this means you are underestimating the total load your hardware needs to support, putting the entire assembly at risk. An 11-pound bracket might not sound like much, but after applying a 5x safety factor, it adds another 55 pounds to your total required load capacity.
Mounting Speakers at the Wrong Height
Mounting speakers too low is a classic recipe for muffled, unclear sound. The audio gets absorbed by the heads and shoulders of people in the first few rows, and everyone in the back hears a muddy, distant mess. On the other hand, mounting them too high without aiming them down is just as bad; the sound flies over everyone's heads and reflects off the back wall, creating a confusing echo.
- The Pitfall: A small church mounted their brand new speakers just 6 feet off the floor. The pastor’s voice was crystal clear in the front pew but was almost unintelligible by the time you got to the tenth row.
- The Solution: We went in and remounted the speakers at 10 feet, using the bracket's tilt feature to aim them down toward the congregation. It completely transformed the room's acoustics. The sound now traveled cleanly over the front rows and reached the entire audience directly. The sweet spot is almost always between 8 and 12 feet from the floor to the bottom of the speaker.
Ignoring Cable Management
Dangling cables aren't just an eyesore; they're a serious safety hazard and just look unprofessional. A stray power or audio cable hanging from a speaker is an open invitation for someone to trip, or for a connection to get yanked out—potentially damaging the speaker, the cable, or the person.
Take the extra hour to run your cables cleanly. Use surface-mounted raceways to create a tidy channel on the wall, or for the cleanest possible look, run the wires inside the wall. Always leave a small "service loop" of extra cable behind the speaker. This little bit of slack makes future adjustments or maintenance a breeze.
By steering clear of these four common mistakes, you’ll ensure your speakers mounting bracket installation is secure, professional, and effective. Taking these extra steps guarantees your sound system will perform at its best and stay safely on the wall for years to come. At John Soto Music, we’re committed to helping you not just choose the right gear, but install it with confidence.
Answering Your Top Speaker Mounting Questions
Even the most detailed plan can bring up questions once you start drilling holes. I get it. After years of installing sound systems, I’ve heard just about every question in the book from church audio teams, school facility managers, and venue owners.
Let's clear up some of the most common concerns to help you move forward with confidence.
Can I Just Use Any Speaker Bracket for My PA Speakers?
Absolutely not. This is one of those safety points you simply cannot afford to get wrong. Professional PA speakers are much heavier and generate way more vibration than the speakers you have in your living room. You have to use a speakers mounting bracket that's specifically engineered for the weight and size of your pro audio gear.
A consumer-grade bracket you find at a big-box store is made for lightweight bookshelf speakers, not a 40-pound RCF or DAS Audio cabinet. Always, always check the bracket's maximum weight capacity. Make sure it exceeds your speaker's weight by a healthy margin—don't just meet the minimum. You also need to verify the mounting hole pattern on the bracket lines up perfectly with the threaded attachment points on your speaker.
A professional-grade bracket is an investment in safety and peace of mind. For a typical pro audio speaker, look for a bracket with a weight rating of at least 75 lbs, even if your speaker only weighs 30 lbs. Better safe than sorry.
How Do I Know if My Wall Can Actually Hold the Speaker?
This is easily the most important safety question in the entire process. The wall itself is the foundation of your installation. If it fails, everything fails.
For a standard drywall wall, you have to anchor the bracket directly into wood or metal studs with heavy-duty lag bolts. A good electronic stud finder is your best friend here. Never guess where the studs are.
If you’re mounting onto solid surfaces like concrete or brick, you'll need a hammer drill and specialized masonry anchors, like sleeve or wedge anchors. These anchors expand inside the hole you drill, creating a rock-solid grip that can support an immense amount of weight.
Real-World Example: Imagine you're mounting a speaker in a school gymnasium with cinder block walls. You can't use a standard drill and plastic anchors—that's a disaster waiting to happen. You need to use a hammer drill with a masonry bit for a clean hole, then install a concrete sleeve anchor rated to hold your total calculated load, which is often over 250 lbs. Anything less is a dangerous gamble. If you have any doubt at all about a wall's structural integrity, stop and consult a licensed contractor.
What's the Ideal Height for Mounting Speakers?
Getting the height right is critical for clear, even sound coverage. You don't want the people in the front row getting blasted while the back of the room can't hear a thing.
As a general rule, you want to position the speaker's high-frequency horn (the tweeter) just above the ear level of a standing audience member. In most venues, this means a mounting height of 8 to 12 feet from the floor.
This height allows the sound to travel over the heads of people up front and reach the back of the room without being blocked. For rooms with sloped floors or balconies, you'll almost always need to go higher. From there, you can use the bracket's tilt function to aim the sound down precisely into the listening areas.
My Speaker Only Has a Pole Socket on the Bottom. How Do I Wall Mount It?
This is a really common scenario. Many portable PA speakers are designed with a standard 35mm (1 3/8") pole socket on the bottom so you can pop them on a speaker stand. But what if you want to mount them permanently on a wall?
Fortunately, there's a specific type of speakers mounting bracket designed for exactly this situation. You're looking for something called a "wall-mount speaker pole adapter" or "spigot bracket."
This handy device has a sturdy wall plate that mounts securely to the wall, and a short, fixed metal pole (the spigot) that sticks out. You just slide your speaker's pole socket down onto this spigot, and it's held firmly in place. It's a fantastic and secure way to mount speakers from brands like dBTechnologies or Yorkville that might not have built-in "fly points" but do have that standard pole mount.
Ready to find the perfect mounting solution for your venue? The team at John Soto Music has the expertise and the professional-grade hardware to ensure your installation is both safe and sounds incredible. Browse our curated selection of speaker brackets and get expert advice today.